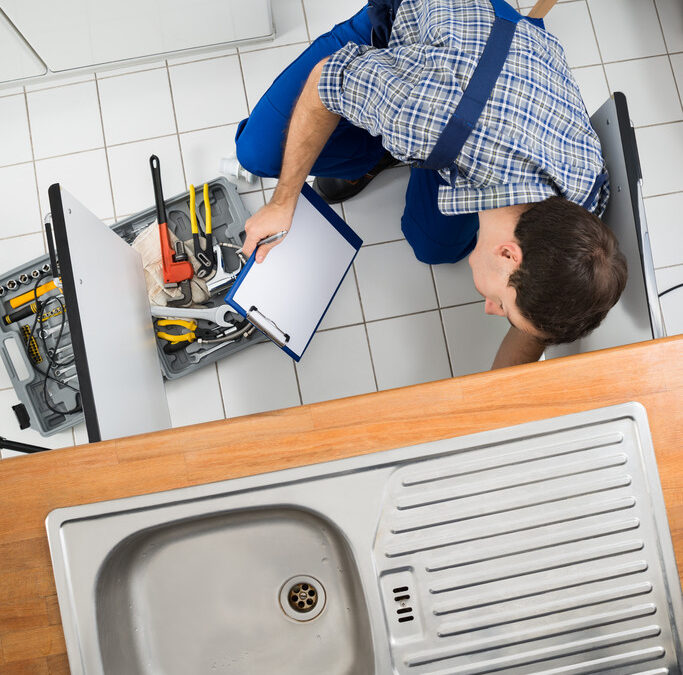
Before you buy a house, you’ll want to check ten key plumbing areas. Start by inspecting main water supply lines and pipe joints for corrosion, leaks, or weak seals. Don’t forget to assess the water heater’s lifespan and condition—older units often need replacing. Test all faucets, outdoor hose bibs, and fixtures for leaks or drip marks, and check water pressure throughout the home. Inspect sewer, drainage, and irrigation lines for blockages or slow drains to avoid costly surprises—there’s much more to look out for.
Key Takeaways
- Inspect main water supply lines and joints for signs of corrosion, leaks, and secure fittings.
- Check the water heater’s age, condition, and maintenance history for reliability and efficiency.
- Assess water quality and test all indoor fixtures for leaks, corrosion, or faulty operation.
- Evaluate drainage and sewer lines for blockages, damage, and compliance with local codes.
- Examine outdoor plumbing, hose bibs, and irrigation systems for leaks, wear, and proper function.
Inspecting Main Water Supply Lines for Leaks and Damage
Before you buy a house, it’s essential to inspect the main water supply lines for leaks and damage. Start by looking for signs of pipe corrosion, such as discoloration or flaking on exposed pipes. Corroded pipes can leak, waste water, and cause costly repairs later.
Use pressure testing to detect hidden leaks—your inspector will pressurize the system and monitor for drops, which signal possible leaks.
Key steps include:
- Visual Inspection: Check for rust, stains, or wet spots along the supply lines.
- Pressure Testing: Confirm the system maintains consistent pressure under controlled conditions.
As plumbing expert Lisa Carter advises, “Early detection of leaks can prevent major water damage and negotiation headaches.”
Make certain these checks are part of your inspection process.
Examining Pipe Joints, Fittings, and Exposed Plumbing
- Check metal joints for corrosion or rust, which can signal potential failure.
- Inspect plastic or PVC fittings for cracks or brittleness.
- Look for mineral deposits around joints, a telltale sign of past leaks.
- Lightly wiggle pipes to test the flexibility and security of connections.
- Confirm all fittings are properly sealed, with no visible gaps or weak spots.
Assessing Water Heater Age, Condition, and Capacity
When considering a new home, it’s essential to closely assess the water heater’s lifespan, condition, and capacity to avoid unexpected expenses down the line.
Assess the water heater’s age, condition, and capacity early to prevent costly surprises after moving into a new home.
Start by locating the manufacturer label and serial number to determine the unit’s vintage; most water heaters last 10 to 15 years. As licensed plumber Jane Smith advises, “Always decode the serial number—don’t rely on guesswork.”
Next, conduct a performance evaluation: look for corrosion, leaks, and listen for unusual noises. Check maintenance records and warranty status, as these affect reliability.
For capacity, review the tank size or flow rate—typically listed in gallons or gallons per minute. Make sure it meets your household’s needs.
If you anticipate changes in family size, consider whether an upgrade or energy-efficient model is necessary.
Evaluating Drainage and Sewer Line Functionality
How can you be sure the home’s drainage and sewer systems are in top shape?
Drainage inspections are essential before you commit to buying. Start by checking the materials used in sewer lines—PVC and cast iron each have different lifespans and durability. Make sure these materials fit local soil conditions and meet code.
Don’t overlook the maintenance history, as frequent sewer repairs may signal ongoing issues.
To help you assess these systems, focus on:
- Inspecting for corrosion, mineral buildup, or decay in pipes
- Reviewing maintenance records for past sewer repairs
- Conducting camera and dye tests for leaks or internal damage
- Ensuring all vent pipes and drain traps work properly
- Verifying compliance with local plumbing regulations
Experts say, “Neglecting these checks can lead to costly surprises.”
Checking Water Pressure Throughout the Home
After you’ve looked over the home’s drainage and sewer lines, it’s just as crucial to check water pressure throughout the property. Use pressure testing techniques, like attaching a test gauge to an outdoor spigot or a faucet near the main supply. Verify all fixtures and appliances are off to get an accurate static reading. Ideal pressure falls between 40 and 60 psi. Check for pressure fluctuation effects by turning on multiple faucets, especially those farthest from the main.
| Indicator | What It Means |
|---|---|
| <40 psi | Possible leak/blockage |
| 40–60 psi | Preferred range |
| >80 psi | Risk of fixture damage |
Low pressure can signal leaks, while high readings may require a regulator. “Uneven pressure suggests hidden plumbing issues,” notes plumbing expert Jane Porter.
Testing Water Quality for Contaminants and Sediment
Water quality testing is a crucial step before you commit to buying a house, especially if the property relies on a private well or sits near industrial or agricultural zones.
Sediment testing reveals hidden risks—from legacy pollutants to heavy metals—that could affect your health and investment long-term. As Dr. Elaine Wu, an environmental chemist, explains, “Comprehensive water and sediment tests protect buyers from costly surprises and guarantee regulatory compliance.”
When evaluating water quality and sediment, focus on these key areas:
- EPA-recommended sediment toxicity and bioaccumulation tests for ecological safety
- Chemical analysis for heavy metals, pesticides, and organic compounds
- Historical pollutant tracking to detect DDT, PCBs, or chlordane
- Grain size analysis to understand sediment composition and contaminant risk
- Pore water testing for dissolved contaminant concentrations
Seek professional testing for reliable results.
Reviewing Faucets, Showerheads, and Fixture Integrity
Before you move forward with purchasing a home, it’s essential to carefully review the condition and performance of all faucets, showerheads, and related fixtures.
Start by testing every faucet for leaks, corrosion, and smooth handle operation; proper faucet maintenance now can prevent costly repairs later. Examine aerators for mineral buildup and listen for odd noises—these can signal deeper issues.
Test every faucet for leaks, corrosion, and smooth operation—catching small issues early helps you avoid expensive repairs down the road.
Next, assess each showerhead for steady water pressure and even spray; consider showerhead upgrades if you spot rust, leaks, or sticking spray settings.
“Minor buildup or visible wear is a red flag that shouldn’t be ignored,” says plumbing expert Karen Hill.
Finally, inspect all fixture connections for leaks, corrosion, or wobbly installation.
Check under sinks for water stains or mold, confirming all seals are tight and intact.
Confirming Proper Operation of Shut-Off Valves
Here’s how you can confirm proper operation:
- Identify valve types at main entry points and fixtures.
- Inspect for corrosion, leaks, or mineral buildup.
- Guarantee handles or levers move smoothly.
- Close valves and verify water flow stops.
- Reopen and check for normal, easy movement.
Identifying Visible Signs of Leaks or Water Damage
After you’ve checked that shut-off valves are working properly, it’s smart to scan the house for visible signs of leaks or water damage.
Start your moisture detection by looking for yellow or brown stains on walls and ceilings—these often signal hidden leaks. Check for peeling paint, bubbling wallpaper, or warped drywall, as these indicate moisture weakening the surfaces.
Yellow stains, peeling paint, or warped drywall could mean hidden leaks are causing moisture damage inside your home.
Don’t ignore musty odors or persistent dampness, especially in bathrooms and basements; these can mean ongoing leaks.
For effective leak prevention, inspect areas around sinks, toilets, and appliances. Look for wet spots, running toilets, or dripping faucets.
“Visible water stains or mold growth are red flags,” says plumbing expert Jamie Carter.
Check inside cabinets, under sinks, and behind appliances to catch early signs before they become major issues.
Investigating Exterior Plumbing and Irrigation Points
When you’re evaluating a home’s plumbing, don’t overlook the exterior systems—they’re just as critical as what’s inside.
Outdoor plumbing maintenance and irrigation system efficiency play a huge role in the property’s long-term health.
“Ignoring exterior fixtures and irrigation can lead to expensive repairs down the line,” notes plumbing inspector Alex Tran.
To thoroughly assess these systems, you should:
- Inspect all hose bibs and outdoor faucets for leaks, rust, and proper operation.
- Check visible water supply lines for corrosion, cracks, or evidence of patchwork.
- Examine sprinkler heads and irrigation valves for clogs, leaks, or misalignment.
- Test outdoor drains and sewer clean-outs for blockages or slow flow.
- Request maintenance records and verify weatherproofing measures for all exterior fixtures.
Being proactive here protects your investment.
Conclusion
Before you buy, take time to inspect these plumbing necessities. “A thorough evaluation can reveal hidden issues and prevent costly repairs,” says licensed plumber Mark Evans. Use this checklist:
- Test water pressure in all areas
- Examine fixtures and visible pipes
- Confirm shut-off valves work
- Check for leaks and signs of water damage
By addressing these points, you’ll make a confident decision and protect your investment. Don’t skip these crucial steps.